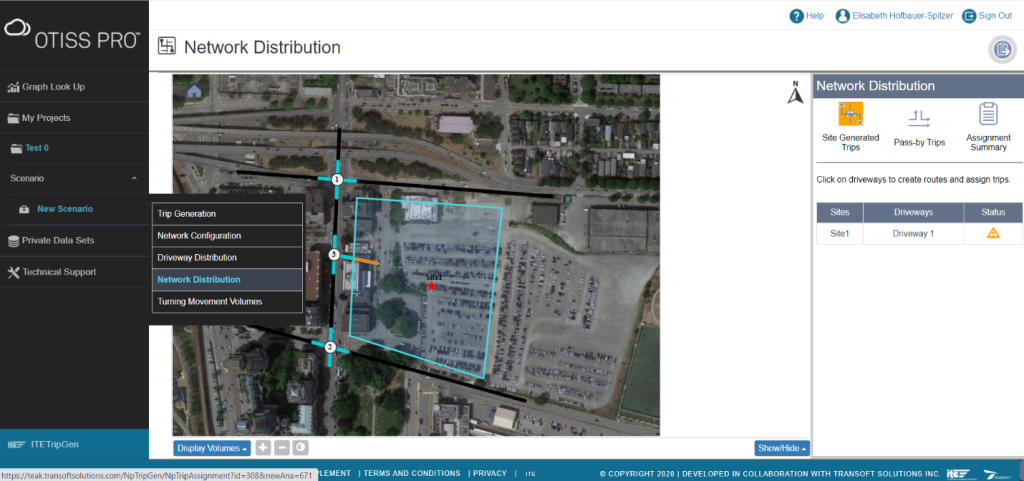
Now that we know the distribution between the driveways, we need to assign the trips to the roads and routes according to your input within the network distribution assignment.
- Select a scenario name in the navigation panel on the left, and then select Network Distribution.
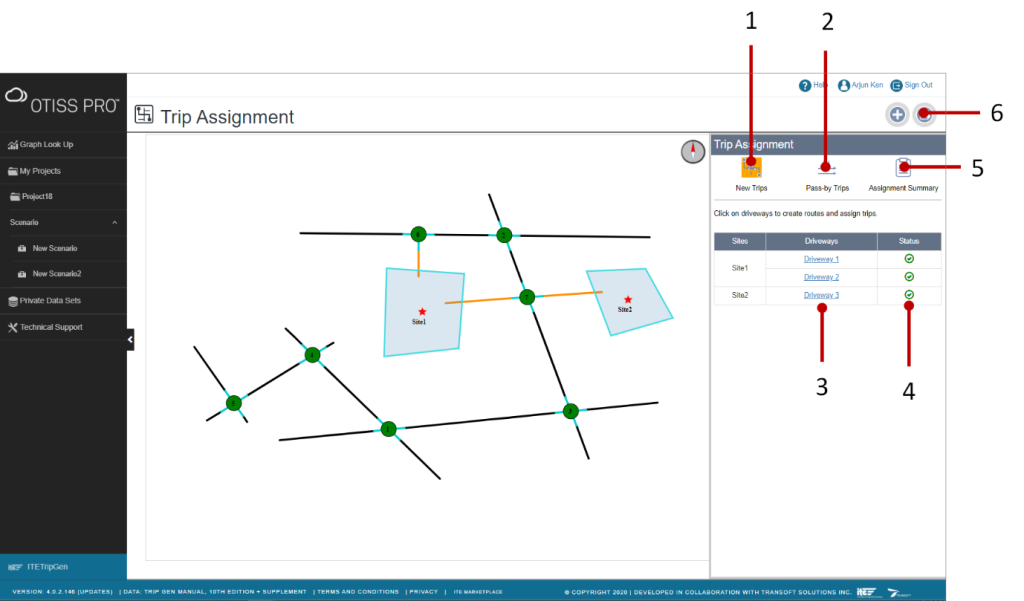
- New Trips – access to view the list of driveways for performing trip assignment by defining routes to/from a driveway
- Pass-by Trips – access to define pass-by trip assignment by defining automated (proportional) or manual pass-by trip assignment
- Driveway (column) – this column lists all the associated driveways of the sites. Access each driveway to perform trip assignment by creating routes and assigning trips (or % of trips) to each route
- Status (column) – this column shows the status in completeness of data entry for the trip assignment
- Assignment Summary – view the trip assignment summary
- Export – export the results of the trip assignment, estimated turning movement volumes, and a CSV file to view the network and turning movement volumes in Synchro®
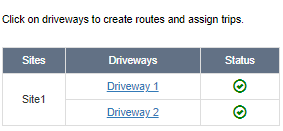
- To perform trip assignment for the trips generated by the development (New Trips), either click a driveway on the map or from the table in the panel.
Note: In the last step, we estimated the New Trips that will go through each driveway. This step is about assigning these trips to the network.
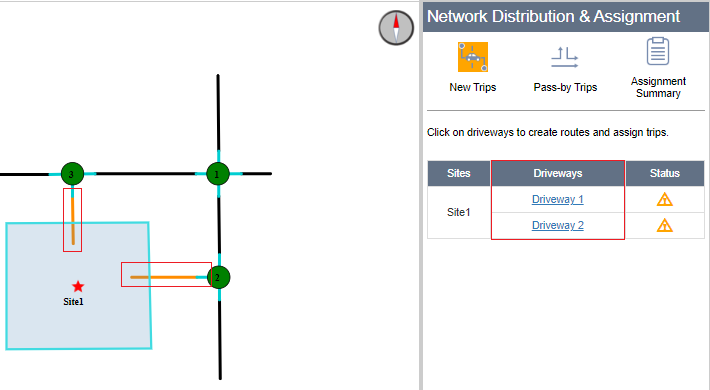
- Create a new route and assign the distributed trips from the selected driveway. Click Add New Route.
Note: You’ll be able to create as many unique routes as necessary based on the built road network on the map.
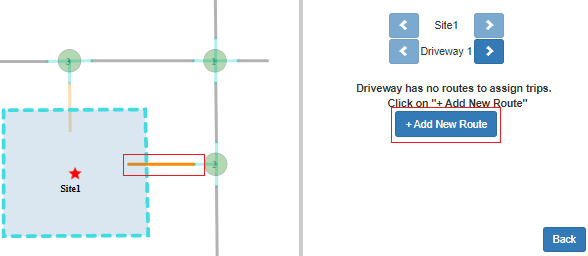
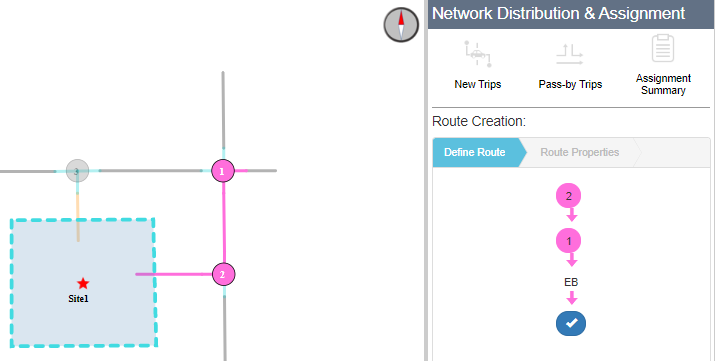
- After you click Add New Route, you will be prompted to select the next intersection node to define the route. Continue to select the intersection nodes on the route, then end the command by selecting any of the flashing intersection legs (as shown by the short legs branching off from the node). A route will be created from the driveway to the point where the intersection leg is selected. To confirm the route definition, click the button. To modify the route, click any of the highlighted intersection nodes and change the route from that point of the route onward. If you want to cancel creating a route, click Cancel.
- After clicking the button, you will be prompted to specify the properties of the route. You can define the direction of the route by specifying inbound and/or outbound.
Useful Tip: If the route is not used for an inbound trip, uncheck the selection of Inbound (likewise for defining Outbound only). If a trip uses one route for an outbound direction only but a different route for its inbound direction, you can still achieve this by creating 2 routes. As a result, all the distributed inbound and outbound trips should have their routes from the origin or to the destination respectively.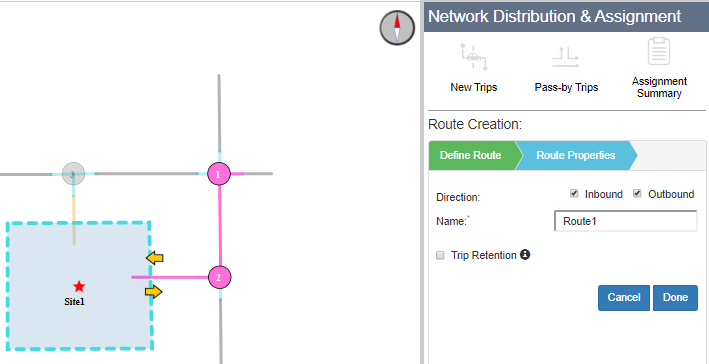
- Specify a name for the route
- Useful Tip: You might want to name it based on its direction, destination, or origin as this will help you recognize it for the Trip Assignment Summary in the report.
- (Optional) Trip Retention may be needed if you need to specify a percentage of trips to be retained as trips travel from the origin to the destination. The assigned trips will get discounted based on the percentages specified, and appropriate turning movement volumes will be estimated at the approach of the downstream intersection node. (e.g. if 10% of 100 trips is discounted, this mean there will be 100 trips at the Origin and only 90 trips at the Destination point). If there is no trip retention, you can leave the default values at 100%.
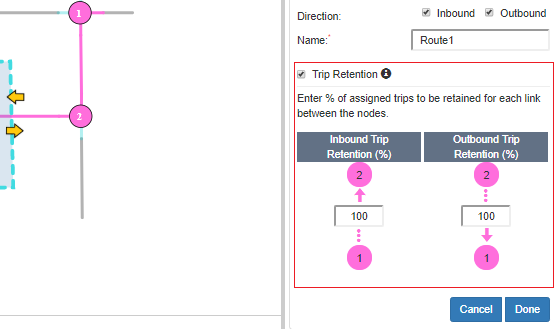
- Once all the required options are set, click Done to finish creating the route.
- To create another route, click Add New Route and repeat the previous steps. Once all the routes have been created, assign the inbound and outbound trips for the selected driveway. Ensure that the Unassigned Trips (%) value is 0% (or “0” if you are using the Numbers option at the top).
Note The cells displaying “Not Permitted” cannot be edited because the route in the corresponding direction is not possible due to the movement restrictions set in the Edit Intersection Details.
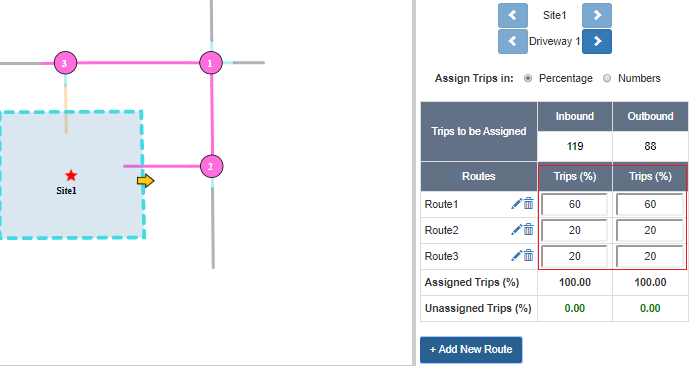
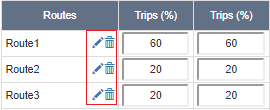
- Click the Edit Route Properties icon to edit the route properties. Click the Delete this Route icon to delete the route.
- Click Done to complete the trip assignment for the selected driveway or click the next arrow to navigate to another driveway. When you do this, the data will be automatically saved.
- Once the trip assignment is completed for all the sites, you should see the driveways status turn green.
- Click the Pass-by Trips button on the top menu to perform Pass-by trips assignment.
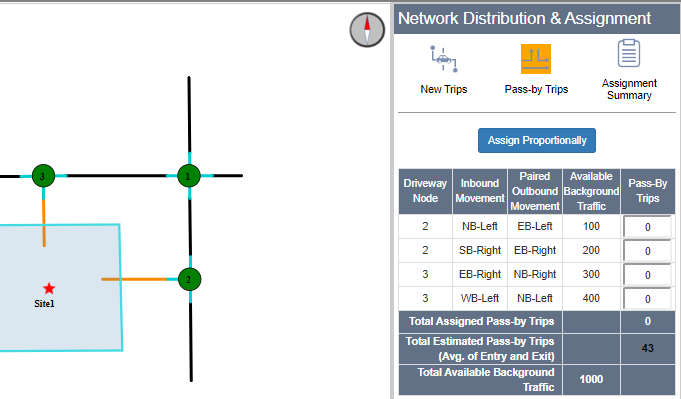
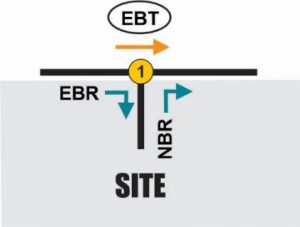
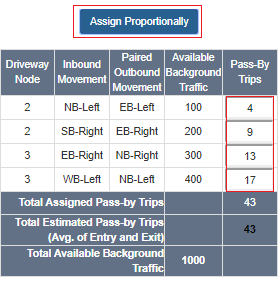
- The table lists all the Driveway Nodes of the sites and all the corresponding passible inbound and outbound movements used by Pass-by trips. For each inbound and outbound movement of the Pass-by trips, Available Background Traffic is shown for your reference to assign Pass-by trips. Available Background Traffic is the background traffic volume of the movement, the direction of which is set to be the same as the direction of the Paired Outbound Movement. For example, if the Pass-by in movement is EB-Right (Eastbound-Right) and out movement is NB-Right (Northbound-Right), the Available Background Traffic is set the same as the direction of the Eastbound-Through movement.
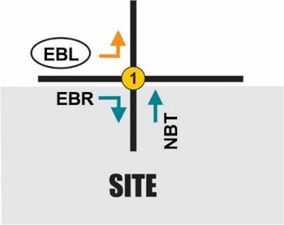
If the Pass-by in movement is Eastbound-Right and out movement, Northbound-Through, the Available Background Traffic is set the same as the Eastbound-Left movement.
- Assign the desired Pass-by trips in the column Pass-by Trips based on the volume of the Available Background Traffic. Alternatively, if you want to automatically estimate and assign Pass-by trips based on the Available Background Traffic, click the Assign Proportionally button. OTISS Pro will assign pass-by trips based on the volume of available background traffic for each pass-by movement pairs. As the assignment is proportional, this means the higher the background traffic, the higher the pass-by assignment value.
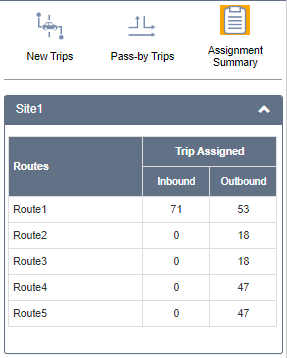
- Once the Pass-by trips assignment is complete, click Assignment Summary to view the summary of the assignment by Site and Routes.
